Day One 2 for OS X
Day One was released in 2011. An outstanding journaling app, it quickly won the hearts of many including receiving App of the Year in 2012 from Apple. It has been one of my favorite apps both on iOS and Mac. It is both a powerful and beautiful application on both platforms.
While this isn’t really a post about photography or filmmaking, per se, I find the journaling app to be a valuable asset to me as a photographer. My photos tell my story or I tell a story with my photography. Wherever I travel, whatever I am doing, I find ways to fit photography into my life. One of my most favorite activities when I travel is simply to roam around photographing the places I go. Day One is a companion for a photographer to journal particularly special photos and places one has been; a map view will show you locations where one was when the entry was created of the geotag of the photo.
I find it relaxing to write down a few thoughts, add a photo, or even just geotag my entry for later review. Journaling was never part of my life until I had the access to a digital one; no matter where I was or what device I had with me, I could add an entry. As Day One has a sync service, I can quickly add an entry from my Apple Watch, just a sentence or two or a location. I can write from my iPhone or my iPad. Or, if I need to write even more, I can do it from my Mac and all my entries will be found on all my devices. Sometimes it is just a photo, sometimes just text, and sometimes a combination of the two.

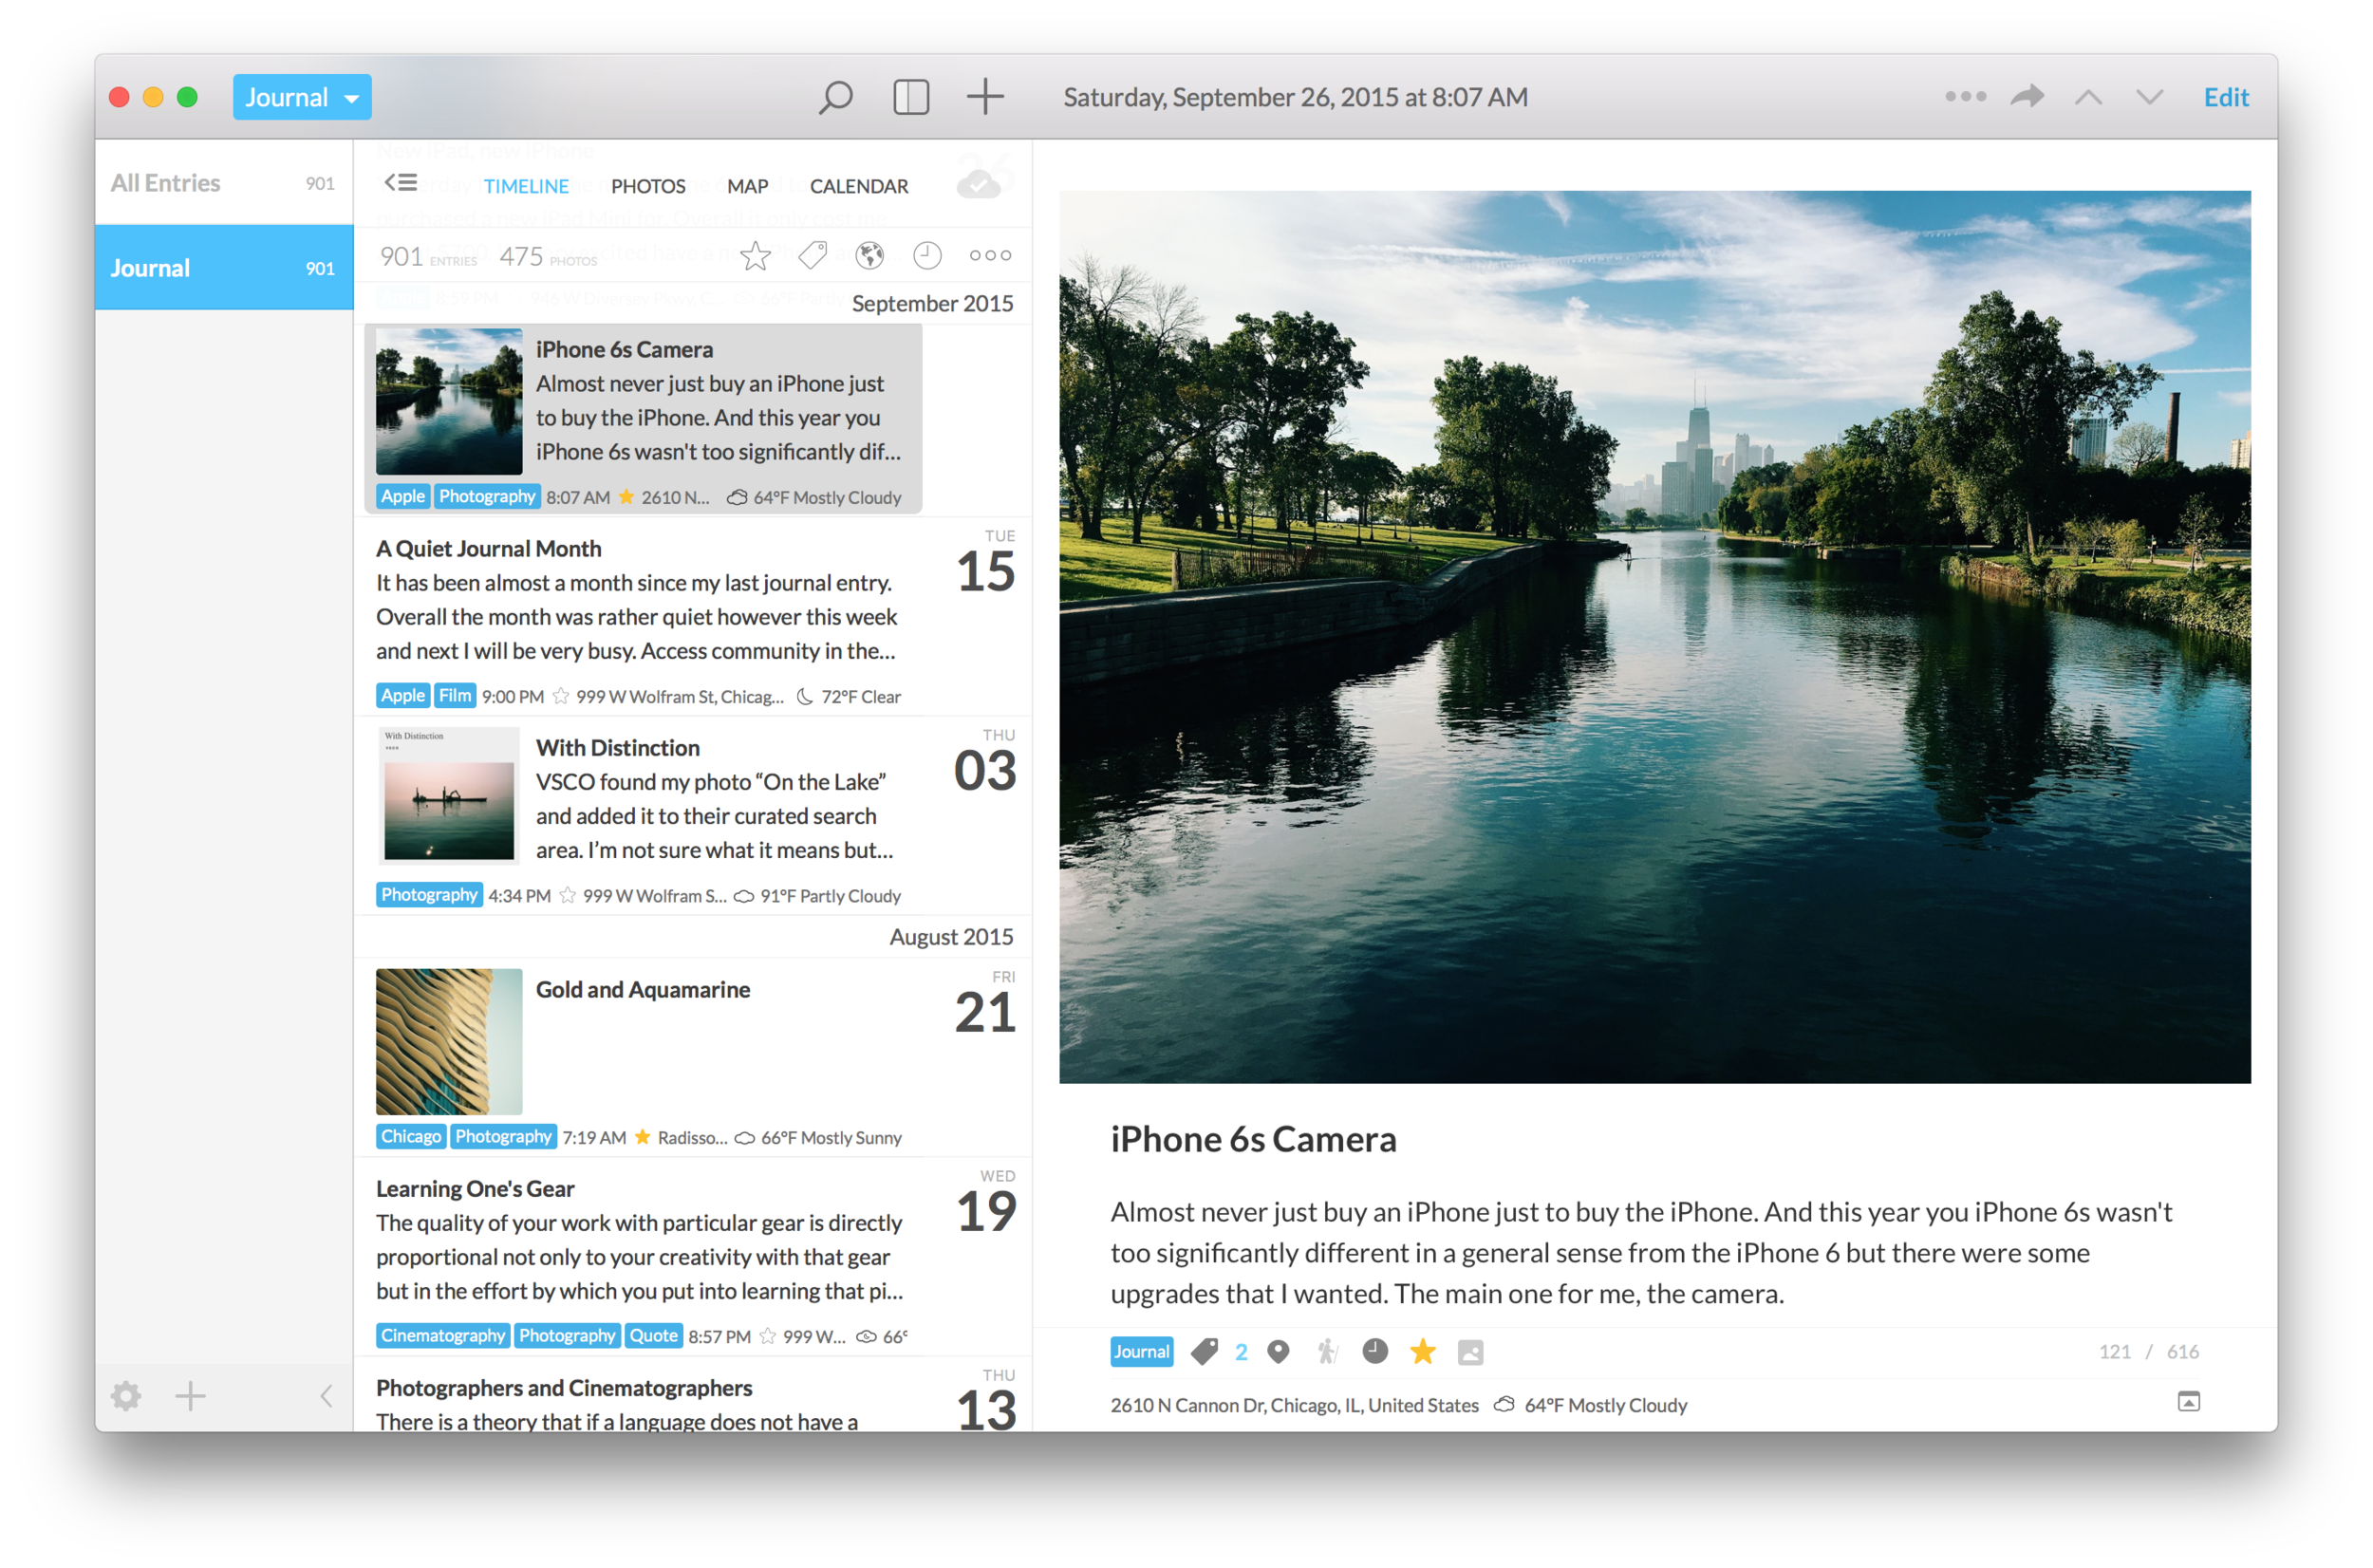
An entry in Day One 2 for iOS
I write this post on the day a new version of Day One is released. Day One 2 rebuilds an already great app. I have only had moments to work with it but it has already proven to be a worthy upgrade. Probably my favorite new feature is the ability to add multiple photos to an entry. Before, it was only one but so many times I found that I my journal entry was incomplete, not telling the whole story with only one image. Now these entries are more dynamic with a digital scrapbook feel. Perhaps a landscape photo where I travel can remind me of the beautiful site while another photo reminds me of the time with friends or family. Day One 2 becomes not only a journal but also a living news feed of life.
As one goes through daily life, it is easy to think we’ll remember everything when, in fact, we won’t. Day One helps piece together our lives with photos, written entries, geo-locations, weather, and even what kind of locomotion at the moment of the entry (train, car, walking, sitting, etc.). A year, ten years, or decades from now, one can open their digital journal and time travel to remember photos, places, faces, and more from long ago.
I highly recommend Day One 2 for Mac and iOS to anyone but for us photographers, this journaling app is a close connection to our passion. Both can be purchased now; the Mac version here and the iOS version here. A timeline of life is something that one can appreciate forever. It is always a pleasure to rewind and reflect on something that might have been forgotten.
P.S. They are 50% for the next week. Ge them at the discounted price while you can!